
Hardware Specifications
| Vendor/Brand | Nokia |
| Model | G-010S-P |
| ODM | SourcePhotonics |
| ODM Product Code | SPS-34-24T-HP-TDFO |
| Chipset | Lantiq PEB98035 |
| Flash | 16 MB |
| RAM | 64 MB |
| CPU | MIPS 34Kc interAptiv |
| CPU Clock | 400MHz |
| System | OpenWRT |
| SFP interfaces | HSGMII |
| Optics | SC/APC |
| IP address | 192.168.1.10 |
| Web Gui | Can be enabled |
| SSH | ✅ user ONTUSER, password SUGAR2A041 |
| Telnet | |
| Serial | ✅ on SFP |
| Serial baud | 115200 |
| Serial encoding | 8-N-1 |
| Form Factor | miniONT SFP |
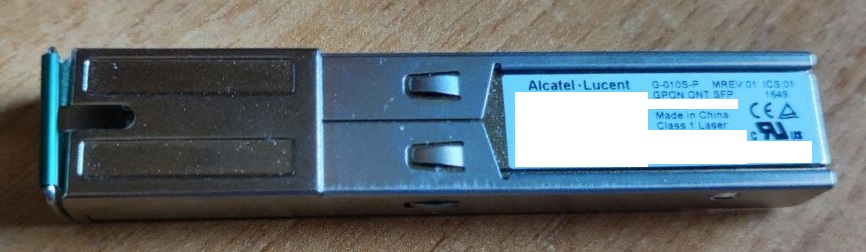
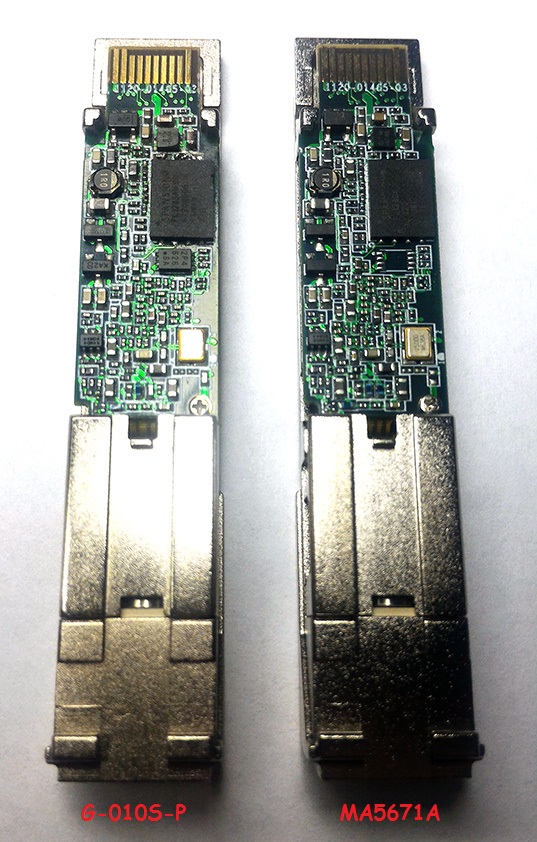
::: warning Warning G-010S-P and other models will not expose an ethernet interface unless the fiber cable is connected ([source](https://forum.mikrotik.com/viewtopic.php?t=116364&start=300)) :::
Firmware is interchangeable with:
- Huawei MA5671A
- FS.com GPON ONU Stick with MAC / SourcePhotonics SPS-34-24T-HP-TDFO
- Hilink HL23446
- Dasan H650SFP
- DpOptics D23446
- Photonics SPS-34-24T-HP-TDFO {.text-red-200} The Nokia G-010S-A can be flashed with the Nokia G-010S-P firmware, provided the MTD layout has been changed beforehand to match the new one. For the full procedure, see the post on lafibre.info
List of software versions
- 3FE56853AOPD39
Serial
The stick has a TTL 3.3v UART console (configured as 115200 8-N-1) that can be accessed from the SFP connector.
| USB TTL(UART) Adapter | SFP 20pins Molex connector |
|---|---|
| 3.3V | pin #15 and #16 |
| TX | pin #2 |
| RX | pin #7 |
| GND | pin #14 and #10 |
Note
Try PIN 10 or other GND PINs if the connection doesn't work by using PIN 14.
Note
Some USB TTL adapters label TX and RX pins the other way around: try to swap them if the connection doesn't work.
List of partitions
Partition layouts change depending on which image is booted, in particular:
When booting image0:
mtd2 ---> image0 (linux)
mtd5 --> image1
mtd3 --> rootfs
mtd4 --> rootfs_data
When booting image1:
mtd2 ---> image0
mtd3 --> image1 (linux)
mtd4 --> rootfs
mtd5 --> rootfs_data
For more info XPONos partition layout.
When booting from image0
| dev | size | erasesize | name |
|---|---|---|---|
| mtd0 | 00040000 | 00010000 | "uboot" |
| mtd1 | 00080000 | 00010000 | "uboot_env" |
| mtd2 | 00740000 | 00010000 | "linux" |
| mtd3 | 0061eedc | 00010000 | "rootfs" |
| mtd4 | 00370000 | 00010000 | "rootfs_data" |
| mtd5 | 00800000 | 00010000 | "image1" |
When booting from image1
| dev | size | erasesize | name |
|---|---|---|---|
| mtd0 | 00040000 | 00010000 | "uboot" |
| mtd1 | 00080000 | 00010000 | "uboot_env" |
| mtd2 | 00740000 | 00010000 | "image0" |
| mtd3 | 00800000 | 00010000 | "linux" |
| mtd4 | 006d8077 | 00010000 | "rootfs" |
| mtd5 | 00410000 | 00010000 | "rootfs_data" |
General Settings and Useful Commands
Bootloader unlock from shell
Warning
It is strongly recommended that you unlock the bootloader before making any major changes to the firmware.
fw_setenv bootdelay 5
fw_setenv asc0 0
fw_setenv preboot "gpio set 3;gpio input 2;gpio input 105;gpio input 106;gpio input 107;gpio input 108"
Info
In general, the last command is not needed because by default serial is already enabled on SFP PINs.
Getting and Setting S/N
To check the current serial number:
onu gtcsngTo set the current serial number:
onu gtcsns ABCD12345678Getting and Setting PLOAM Password
To check the current password (the password field contains decimal values of ASCII characters):
onu gtccgTo set the current password:
uci set gpon.ploam.nPassword="0x30 0x31 0x32 0x33 0x34 0x35 0x36 0x37 0x38 0x39"
uci commit
Info
There is also the onu gtc_password_set command to set the ploam password but it does not seem to work.
Getting/Setting Speed LAN Mode
The known speed values are as follows:
| Value | Speed |
|---|---|
| 4 | 1 Gbps |
| 5 | 2.5 Gbps |
To set the (H)SGMII Mode:
fw_setenv sgmii_mode 5To remove the value (back to default):
fw_setenv sgmii_modeTo get the (H)SGMII Mode:
onu lanpsg 0The link_status value shows the speed.
Disabling Dying Gasp
fw_setenv nDyingGaspEnable 0Rebooting the ONU
rebootChecking whether the connection with the OLT was successful (O5 state)
onu ploamsgEnabling the Web UI
To activate the web-ui you can use this guide from dslreport forum archived on archive.org.
Transferring files to the stick
Info
If you use a modern OpenSSH version (e.g. >= 8.8) you will have to use the legacy protocol and enable some deprecated algorithms: scp -oKexAlgorithms=+diffie-hellman-group1-sha1 -oHostKeyAlgorithms=+ssh-dss [...]
# scp rootfs.bin root@192.168.1.10:/tmp/Backup of all partition
Make a backup of all partitions, an easy way is:
- On the stick run:
cat /proc/mtd- For each mtdX run in the lantiq shell:
cp /dev/mtdX /tmpInfo
If you use a modern OpenSSH version (e.g. >= 8.8) you will have to use the legacy protocol and enable some deprecated algorithms: scp -oKexAlgorithms=+diffie-hellman-group1-sha1 -oHostKeyAlgorithms=+ssh-dss [...]
And in the computer shell:
scp ONTUSER@192.168.1.10:/tmp/mtdX ./Checking the currently active image
# fw_printenv committed_imageBooting to a different image
# fw_setenv committed_image 0|1
# fw_setenv image0|1_is_valid 1
Cloning of mtd1 (image 0) into mtd5 (image 1)
Warning
Image 0 can be flashed to image 1, while image 1 cannot be flashed to image 0 because it has larger rootfs_data
The following commands are used to clone image0 to image1 and then boot to it
# cat /dev/mtd2 > /tmp/mtd2.bin
# mtd -e image1 write /tmp/mtd2.bin image1
# fw_setenv committed_image 1
# fw_setenv image1_is_valid 1
# reboot
Flashing a new rootfs via SSH
Info
Only the inactive image can be flashed
The following commands are used to flash a new rootfs to image1 and then boot to it
# mtd -e image1 write /tmp/rootfs.bin image1
# fw_setenv committed_image 1
# fw_setenv image1_is_valid 1
# reboot
Warning
Some OLTs don't like when ONTs don't boot from image 0, therefore the previous procedure must be preceded by the following procedure with inverted images, as to clone image 1 into image 0
TX Fault / Serial
The stick stays in a perpetual "TX Fault" state since the same SFP pin is used for both serial and TX Fault signaling, if that causes you issues (normally it shouldn't) you can issue the commands below to disable it. Note that it will disable both the TX Fault signal and Serial on the stick after boot.
fw_setenv asc0 1
fw_setenv preboot "gpio set 3;gpio input 100;gpio input 105;gpio input 106;gpio input 107;gpio input 108"
In case you need to re-enable it issue the following commands from the bootloader (FALCON)
FALCON => setenv asc0 0
FALCON => saveenv
Miscellaneous Links
- Asenheim firmware repository - alternative firmware collection for ODI/HSGQ, Alcatel/Nokia and Huawei modules
- alcatel_lucent-lantiq_falcon
- uboot lantiq falcon
- Usage GPON module SFP in Spain